Deep Code Quick Start: Use AI as Your Super Assistant
Following our previous installation tutorial, today we will jump right into the practical side. If you are new to AI-assisted programming, do not let the word "programming" intimidate you. Deep Code was designed from the ground up to make development incredibly simple.
Step 1: Set Up Your Working Directory
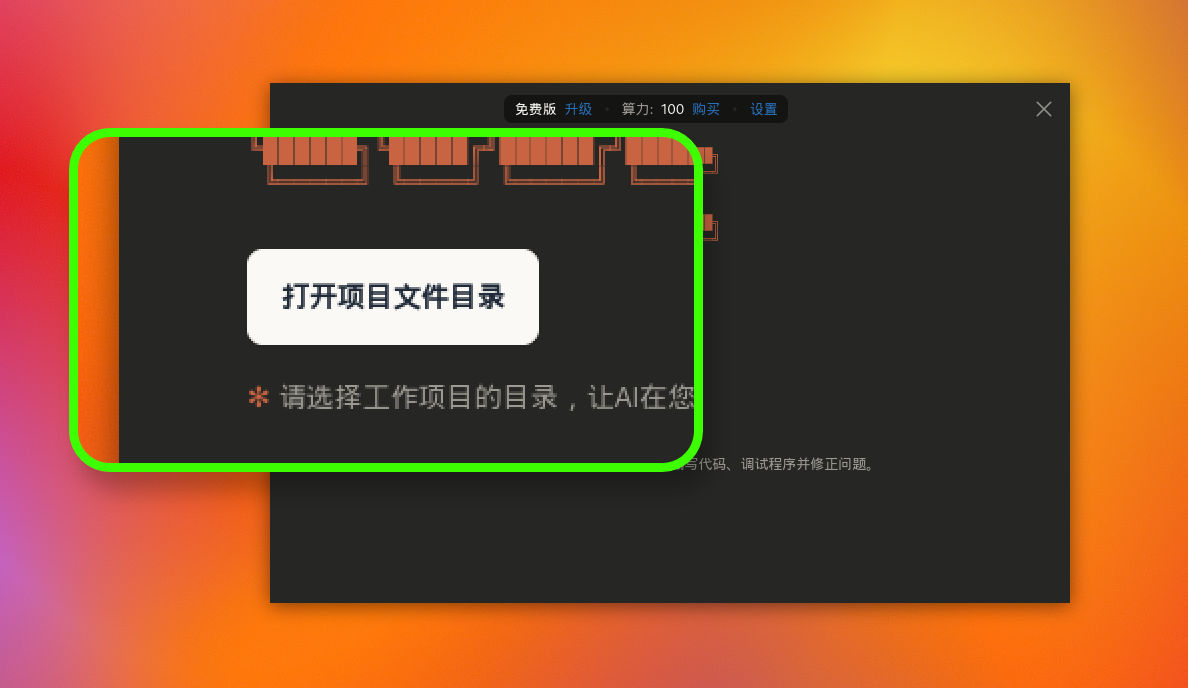
When you first launch Deep Code, you will be greeted by a clean, minimal start screen. The most prominent element in the center is the "Open Project Folder" button.
What is a "Project Folder"? Simply put, it is the folder where your code project lives. Why do you need to select one? Because Deep Code is a very disciplined AI. It will explicitly ask you to choose a project directory so that the AI can write code, run debugging, and fix issues only within your specified project. Think of it as giving the AI a dedicated construction zone -- all of its operations will be strictly confined to that area.
Step 2: The Intuitive Interface
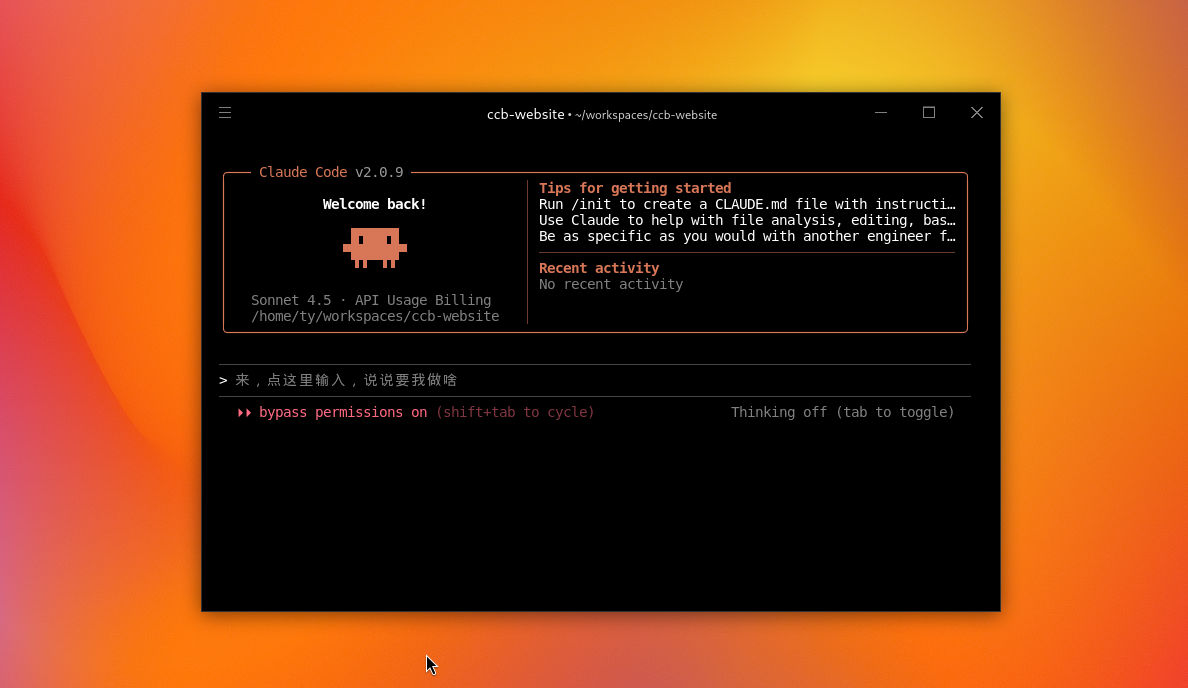
Once you have selected a directory, you will enter the main interface. It may look professional, but it is actually very straightforward:
- Path Display at the Top: At the very top of the window, you can clearly see the full path to your current project (for example: ~/workspaces/ccb-website). This is a thoughtful design choice -- when you are juggling multiple tasks, a quick glance at the top tells you exactly which folder the AI is working in, so you never lose track.
- Mascot and Status: In the middle of the screen, you will see the Claude Code version number (e.g., v2.1.103) and the signature pixel-art mascot. Seeing it means your AI assistant is ready and standing by.
- Main Input Area: At the bottom of the interface, there is a gray prompt that reads something like "Click here to type and tell me what to do." This is where you give your instructions. Just click and type what you need (for example, "Build me a login page"), and Deep Code will begin analyzing the request, create a detailed plan, and execute it like an experienced developer.
Step 3: Multi-Task with Parallel Windows
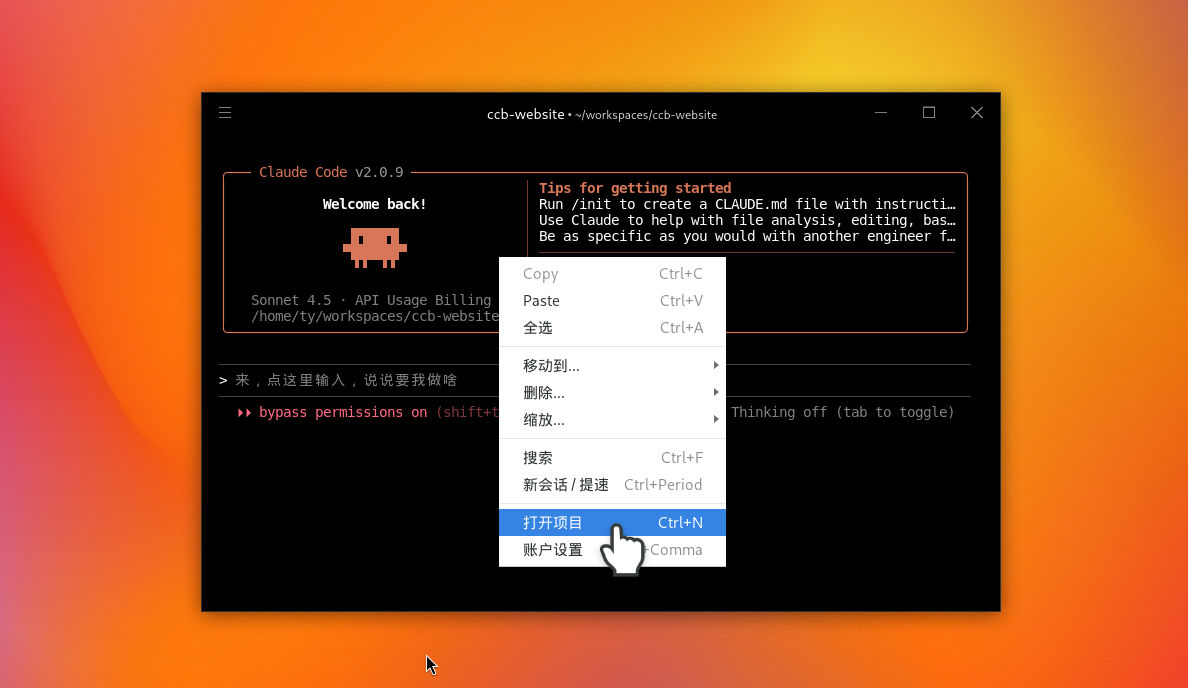
If you have multiple projects to work on, Deep Code can handle that with ease. Simply right-click at any time to select "Open Project" from the context menu, or use the shortcut Ctrl + N to open a new project. You can even have multiple windows open simultaneously, letting Deep Code work on different projects in parallel for maximum efficiency!
Summary
Deep Code turns plain English instructions into real code. All you need to do is point it at a project folder, click the voice input button in the bottom-right corner and say what you need — no typing required, and let it handle the rest — it figures out the plan, writes the code, and keeps everything scoped to that directory so you always know exactly where it's working. The current path stays visible at the top of the window at all times, so even if you're juggling multiple projects, a quick glance tells you which one you're in. Need to work on several things at once? Just open a new window with Ctrl + N and run them in parallel.
Now that you know the basics, head over to the Walk-Through Guide to see Deep Code tackle a real project end to end — including how to read its status indicators, how it self-corrects when something goes wrong, and what a finished result actually looks like.